


Home / Blog Center / Chargers / Steps to Create a DIY Wall Shelf Using Cardboard Boxes
Steps to Create a DIY Wall Shelf Using Cardboard Boxes
18/06/2025 | OtterOasis
Numerous companions get ready divider racks some time recently brightening their modern homes, but in reality, divider beautifications got to be changed regularly. Something else, they can gotten to be very dull over time. To form divider enrichments see more curiously, a few companions select to DIY divider racks utilizing cardboard boxes. Underneath, I'll share the steps for how to DIY a divider rack utilizing cardboard boxes.
Steps for DIYing a Divider Rack with Cardboard Boxes:
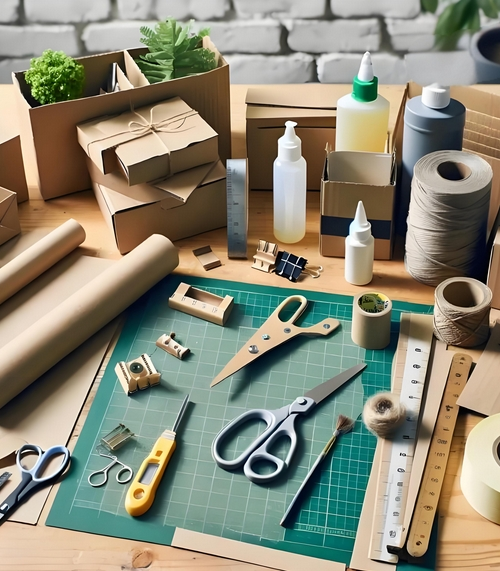
1. Plan Materials and Apparatuses
Some time recently beginning the cardboard DIY divider rack venture, you'll got to assemble a few fundamental materials and instruments. You'll require a few suitably sized cardboard boxes, which can be ancient conveyance boxes or pressing boxes. Guarantee that the boxes are undamaged and tough sufficient. Moreover, assemble a few essential instruments like scissors, stick, a ruler, a pencil, and divider nails or snares.
2. Plan the Rack Structure
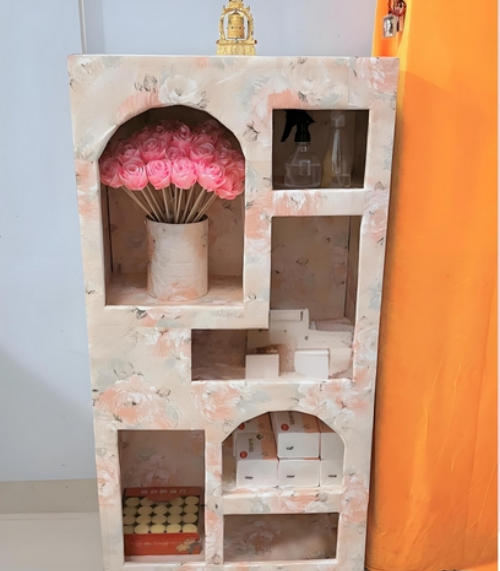
Some time recently getting hands-on, it's fitting to make a plan. Draw out your craved rack arrange on paper; it can be a single layer or different layers, depending on your needs and divider space. Consider diverse shapes, such as rectangular, trapezoidal, or L-shaped, guaranteeing that it meets your capacity needs whereas too being tastefully satisfying. In case essential, clarify the measurements of each portion on your cardboard plan outline.
3. Make the Cardboard Parts
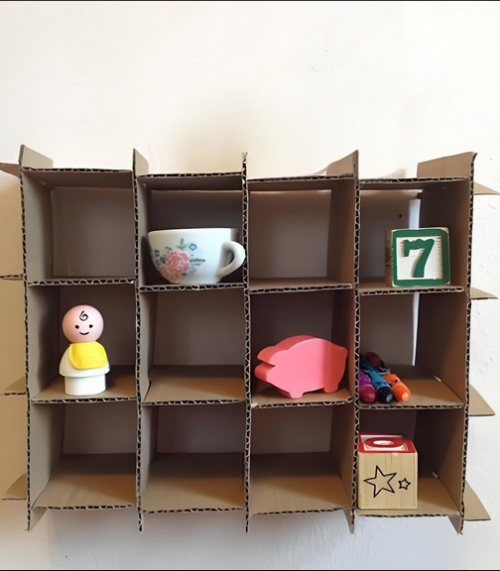
Based on the plan draws, begin cutting the cardboard. Utilize a ruler and pencil to degree the desired measurements and carefully cut out the fundamental pieces with scissors. For the most part, you'll ought to make a foot board and a few side boards. The side boards can be outlined with openings for setting books, little decorations, or other things, otherwise you can select to keep the boards intaglio for included solidness.
4. Collect the Rack
After cutting, start collecting the cardboard components. You'll be able join the side boards to the foot board utilizing stick, guaranteeing a solid bond. To upgrade the solidness of the rack, consider including extra bolster strips interior, which can be made from remaining cardboard to extend the generally quality of the rack. Hold up for the stick to dry, which ordinarily takes some hours, amid which you'll get ready the establishment on the divider.
5. Divider Planning and Establishment
Once the cardboard rack is totally dry, plan the divider for establishment. Select an suitable spot to mount your rack, guaranteeing that its tallness and width are outwardly satisfying and viable. Utilize a ruler and pencil to check the positions for the snares or nails, making beyond any doubt the rack will hang relentlessly on the divider. Take care when penetrating to dodge harming the divider.
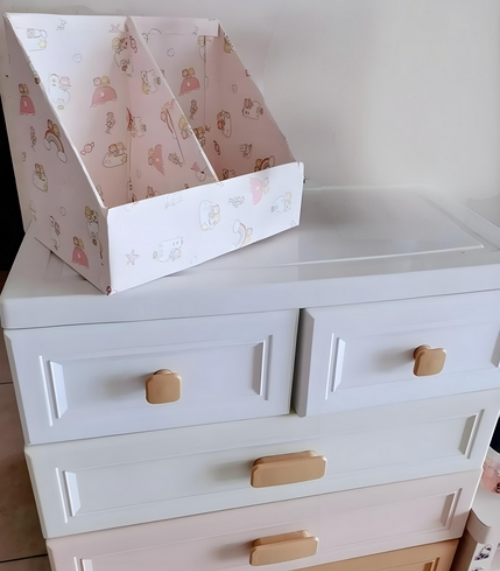
6. Beautification and Usefulness
Once the cardboard rack is amassed and mounted, you'll continue with the ultimate enhancement. You'll select to paint it in your favorite color or cover it with designed paper to allow it more fashion. On the off chance that required, consider including little capacity boxes or bushel, which can not as it were improve the aesthetics but moreover increment capacity common sense. You'll be able show books, plants, and embellishing things on the rack, exhibiting your identity.
7. Completion and Upkeep
At last, check the steadiness of the rack to guarantee there are no free parts. Routinely review the condition of the cardboard; in case you take note any wear or harm, repair or supplant it expeditiously. Too, clean the things on the rack frequently to preserve cleanliness.
In summary:I've shared the steps for DIYing a divider rack with cardboard boxes. In the event that you need to memorize more related information, it would be ideal if you proceed to follow our site, where we'll display more energizing substance within the future.
