


Home / Blog Center / Chargers / How to Install a Kitchen Cabinet Dish Basket: Step-by-Step Guide
How to Install a Kitchen Cabinet Dish Basket: Step-by-Step Guide
25/06/2025 | OtterOasis
A cabinet dish wicker container is introduced interior kitchen cabinets and is utilized to store bowls, plates, and kitchen utensils. It is ordinarily made of metal wire work or stainless steel, including great ventilation and waste, which makes it helpful for drying and organizing dishes. So, how may be a cabinet dish bushel introduced?
Steps to Introduce a Cabinet Dish Rack:
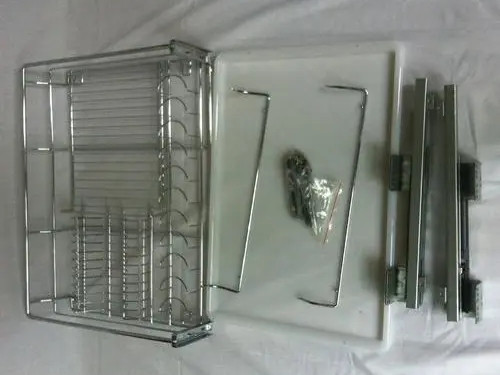
1. Plan the Dish Rack and Establishment Apparatuses
After obtaining the dish rack, take out the rack and related establishment adornments, lay them out flawlessly, and check whether there are any quality issues or lost parts. You may too got to plan apparatuses such as a screwdriver, electric bore, and pencil. Some time recently establishment, it is fitting to perused the product’s instruction manual to get it the establishment steps.
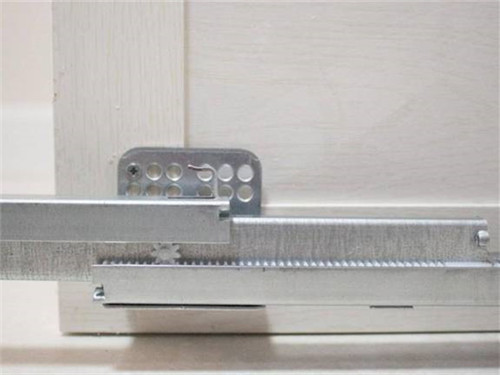
2. Introduce the Rails
Introducing the rails requires utilizing situating clips for the sliding rails. Overlap the clip at the stamped position, at that point adjust the clip along the cabinet edge. Utilize a pencil to stamp the mounting gaps of the sliding rails on the cabinet. Another, put the sliding rail on the cabinet side board. By and large, the moment gap from the front conclusion of the sliding rail ought to adjust with the checked gap on the cabinet side board. At last, utilize an electric penetrate to settle the screws onto the rails. On the off chance that the cabinet is made of marble, utilize a glass penetrate bit to bore gaps at the checked focuses, embed extension plugs into the gaps, and after that secure the sliding rails with screws.
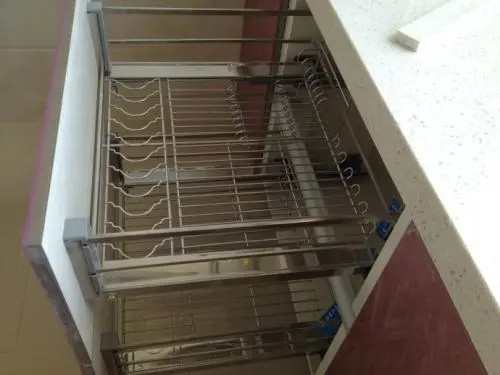
3. Introduce the Dish Rack
Join the clips to both closes of the dish rack. At that point lift the dish rack and put it onto the sliding rails, guaranteeing the clips at the raise of the dish rack snare onto the rails. Press the front conclusion of the dish rack onto the rails and fix the screws into the screw gaps at the front of the dish rack. After the rack is settled, you'll put the deplete plate on the rack underneath the dish wicker container.
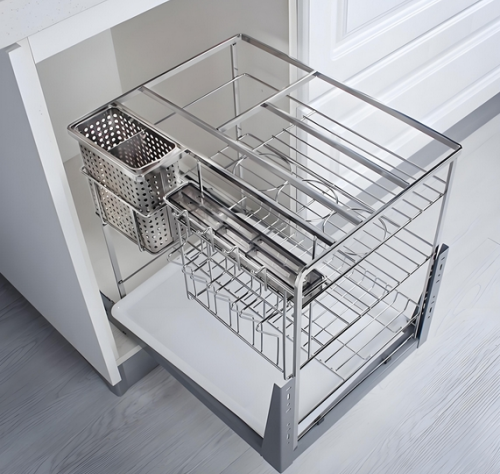
4. Introduce the Cabinet Entryway
For pull-out dish racks, you wish to connect the cabinet entryway to the dish rack or rails. Utilize the situating layout to stamp the mounting gaps for the connectors on both sides of the cabinet entryway. Adjust the screw gaps of the connectors and settle them onto the entryway board utilizing an electric bore. At that point, marginally unscrew the alteration screws within the center of the connectors, adjust the entryway connector with the comparing gaps at the front of the pull-out bushel, and fix the settling screws with a screwdriver.
In summary:This brief direct presents how to introduce a cabinet dish rack. We trust that after perusing this article, you may discover it supportive as a reference for your future establishment. For more related data, if you don't mind proceed to take after our site.
