


Home / Blog Center / Chargers / How to Securely Install a Floating Desk
How to Securely Install a Floating Desk
18/08/2025 | OtterOasis
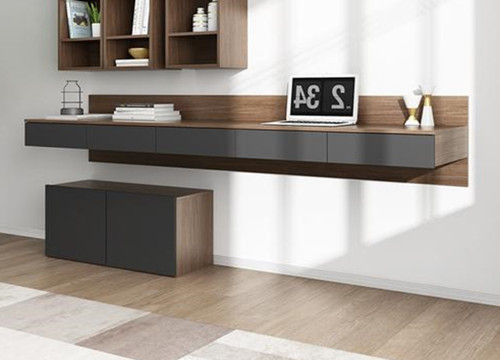
Wall-mounted work areas are progressively well known among small-space families and those who incline toward moderate plan, much appreciated to their smooth appearance, space-saving points of interest, and advanced tasteful. Be that as it may, due to the need of floor bolster, their establishment solidness gets to be a beat concern for clients. So, how do you safely introduce a wall-mounted work area? Let's discover out!
How to Introduce a Wall-Mounted Desk:
1. Affirm Divider Structure and Load-Bearing Capacity
Before introducing a wall-mounted work area, to begin with decide the divider fabric and its load-bearing capacity. The perfect establishment area is a load-bearing divider, such as a concrete or strong brick divider, which can back heavier weights. Maintain a strategic distance from coordinate establishment on empty brick, drywall, or lightweight segment dividers. If establishment on such dividers is vital, utilize extraordinary divider grapples or through-bolts to improve stability.
2. Select the Right Mounting Bracket
The soundness of a wall-mounted work area generally depends on the bolster bracket. Common alternatives incorporate L-shaped metal brackets, back legs, or concealed cantilever brackets. Select the sort based on the desk’s measure, weight, and your individual fashion inclination. The bracket fabric ought to be durable metal, such as stainless steel or high-strength steel, and must have a weight capacity surpassing the add up to weight of the work area and its contents.
3. Precisely Position and Stamp Bore Focuses
Use a level to decide the wanted tallness and arrangement of the work area to maintain a strategic distance from tilting. Position the bracket against the divider and stamp the screw gap areas with a pencil. Guarantee all marks are precise—especially for dual-bracket setups, where both sides must be at the same tallness to avoid an uneven or unequal desk.
4. Safely Secure with Extension Screws
Drill gaps at the checked spots, embed plastic stays, at that point screw the bracket immovably into the divider utilizing extension screws. It is suggested to utilize adequately long screws (such as M6 or M8) to guarantee profound infiltration into the divider for a strong association. After establishment, delicately shake the bracket to check for any looseness.
5. Join the Desktop and Test Stack Capacity
Place the desktop onto the secured brackets. Depending on the plan, utilize screws from underneath to secure the desktop to the brackets and anticipate sliding. Once introduced, press down gently on the work area by hand to test solidness, at that point steadily include things to test its stack capacity and guarantee the whole structure is secure and reliable.

In summary:That concludes our direct on how to safely introduce a wall-mounted work area. We trust this data is accommodating. For more related substance, it would be ideal if you proceed to take after our site.
