


Home / Blog Center / Chargers / What Is the Method for Building Brick-Supported Cabinet Base?
What Is the Method for Building Brick-Supported Cabinet Base?
21/08/2025 | OtterOasis
As present day domestic aesthetics and development strategies proceed to progress, more and more imaginative cabinet plans are rising. Among them, the "tile-clad cabinet" has continuously picked up consideration as a special frame that mixes conventional stone work methods with present day custom furniture concepts. But how precisely is a tile-clad cabinet made?
How Is a Tile-Clad Cabinet Made:
1. Plan and Arranging Phase
Before development starts, a nitty gritty plan must be carried out based on the kitchen or utilization space’s measurements, format, and the homeowner’s propensities. Decide the cabinet fashion, measurements, and useful zones (such as base cabinets, divider cabinets, countertop positions), and clearly distinguish which parts will utilize the tile-clad method. At the same time, select appropriate tiles or lightweight embellishing bricks, considering whether their color, surface, and measure coordinate the generally insides plan. Amid the plan stage, be beyond any doubt to save space for water and electrical channels, outlets, and vent channels to maintain a strategic distance from clashes later.
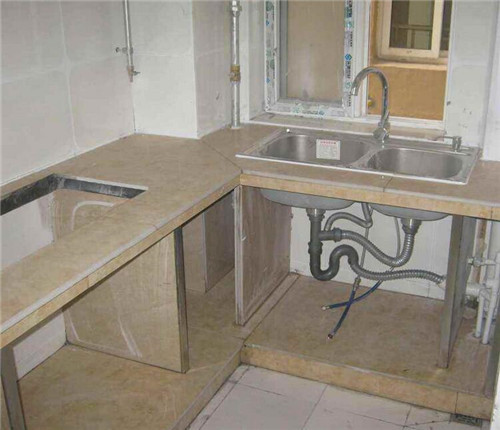
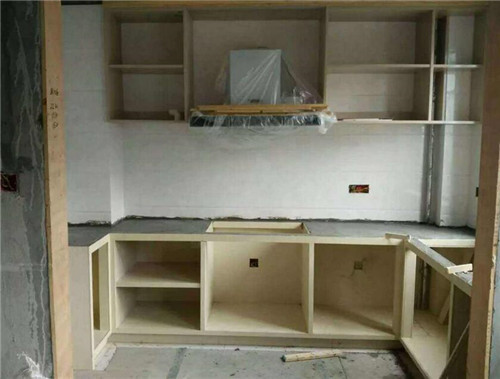
2. Developing the Base Frame
The base structure of a tile-clad cabinet is regularly built utilizing moisture-resistant materials such as plywood or strong wood finger-jointed sheets to shape the cabinet’s skeleton. This outline gives auxiliary bolster and shape soundness. The base boards ought to experience moisture-proofing and anti-warping medications, such as applying waterproof paint or joining dampness boundaries. After the outline is built, it must be leveled both on a level plane and vertically to guarantee a level surface for ensuing tiling.
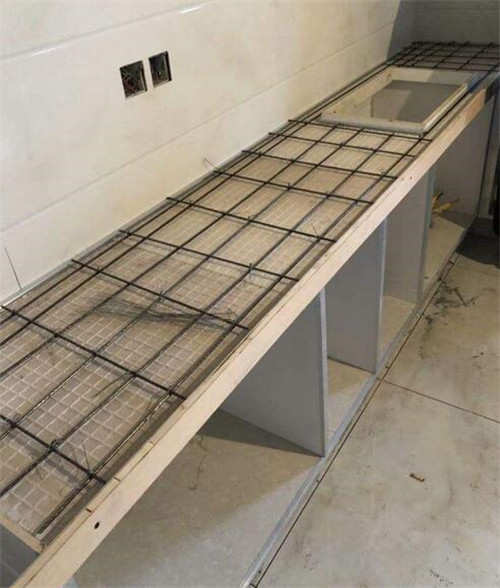
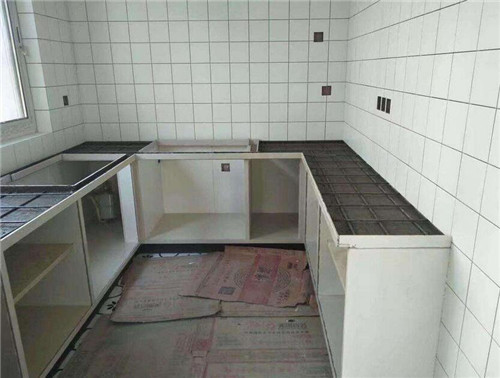
3. Applying Tiles or Embellishing Bricks
Apply specialized tile cement equitably onto the surface of the base outline, at that point carefully join pre-cut tiles or embellishing bricks one by one, clearing out fitting holes (more often than not 1.5–3 mm) for grouting afterward. Utilize a level and tile spacers amid establishment to guarantee a level surface and uniform joints. For entryway boards, tiles can to begin with be followed to custom base boards to make standalone “tile doors,” which are at that point mounted onto the cabinet outline utilizing hinges.
4. Grouting and Edge Finishing
Once the tile cement has totally cured, fill the joints with waterproof, mold-resistant grout and wipe truant any buildup on the surface with a saturated cloth. Apply high-quality silicone sealant at the joints between the cabinet and the divider, countertop, or ceiling to move forward water resistance and visual ask. For entryway board edges, consider counting stainless steel or aluminum trim strips to advance durability and refine the in common wrap up.
5. Introducing Equipment and Useful Components
Finally, introduce vital equipment such as pivots, handles, drawer slides, and pull-out wicker container. If lighting is portion of the plan, pre-cut openings in the underside of divider cabinets and introduce Driven strips. After all components are in put, conduct a full alteration to guarantee entryways open and near easily, drawers coast effortlessly, and tiles stay secure without breaking or loosening.

In summary:That’s it—the over substance clarifies how tile-clad cabinets are made. We trust this data is accommodating. For more related information, if it's not too much trouble proceed to take after our site, where we will give indeed more comprehensive and important substance in the future.
